Saturday, July 14, 2007

Make a Digital Pinhole Camera

Go retro with a super-low-tech digital camera trick.


Get published, get famous! Each week, we select our favorite reader-submitted photo based on creativity, originality, and technique. Every month, the best of the weekly winners gets a prize valued at between $15 and $50.

Here's how to enter: Send us your photograph in JPEG format, at a resolution no higher than 640 by 480 pixels. Entries at higher resolutions will be immediately disqualified. If necessary, use an image editing program to reduce the file size of your image before e-mailing it to us. Include the title of your photo along with a short description and how you photographed it. Don't forget to send your name, e-mail address, and postal address. Before entering, please read the full description of the contest rules and regulations.
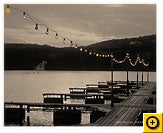
Click for full image.This Week's Hot Pic: "Lake Austin," by David Keenan, Austin, Texas

David says: "I took this photograph near a popular Austin restaurant with my Konica Hexar RF rangefinder camera. I was struck by the row of multicolor light bulbs, the water, and the setting sun in the distance.

"I scanned the transparency using a Nikon 5000 scanner and then edited it in Photoshop CS2. I converted a layer to monochrome and tinted it slightly using a warming filter. Then I used the history brush to recover the colored light bulbs.

"The whole idea of this particular image unfolded as I worked with it. The original full color image was pretty, but the idea of something more vintage while retaining the color of the bulbs came to me gradually as I worked on it."

Starting with the May Hot Pic of the Month, I've decided to let you pick the winner--after all, why should I have all the fun?

The poll is now open. From now till Sunday, June 3, you can view a slide show of our five Hot Pic winners for May. After you check out the contestants, click the "Vote for This Entry" link on any of the pages to cast your vote. I'll announce the winner in my June 5 newsletter.

At the risk of dating myself, I feel compelled to say that when I was a kid, I did all the things budding geeks were supposed to do. For example, I made a crystal radio (a simple radio that doesn't need a battery) and a pinhole camera. A pinhole camera is perhaps the simplest kind of photographic device, because it uses no lens. A tiny pinhole in a well-sealed cardboard box is all you need to capture an image on film.

You can experience some of this excitement by making your own lens-free digital camera. For the best results, you need a digital SLR (so you can remove the lens), a body cap (the cover that screws onto the camera body when there's no lens attached), some heavy foil, and electrical tape. Ready to play along?

Drill Some Holes

To begin with, you'll need to make a hole in the camera's body cap. I don't suggest poking a hole in your only cap, so stop into your local camera shop and get a spare or two. They cost about $3 each, and it's always handy to have an extra in case you need to remove the lens for more than few moments.

The size of the hole isn't especially important. I drilled a 5/32-inch hole in the center of the cap using an ordinary household drill--after removing the body cap from the camera first, of course.

Next, you need to make a smaller hole in some heavy foil--this is the real pinhole. A foil pie tin works great for this. Cut a small circle out of the tin that will fit inside the back of the body cap and then use a thin, sharp pin to make a tiny hole in the metal.

When you're done, use some electrical tape to position the pie tin on the body cap so the two holes line up, with the small hole in the center of the circle.

Take Some Pictures

Now remove the lens from your camera and screw on the body cap. You've just made a pinhole camera: Instead of expensive, multi-element, precision optics, your camera now works on the low-tech principle that an extremely small hole will cause a relatively sharp image to resolve on the sensor.

Click for full image.From here it's all about experimenting. You'll almost certainly want to use a tripod, because you'll need long shutter speeds. Set your camera to its manual exposure mode and start with a 1-second exposure. Check your results and go up from there; I found a 15-second exposure was good outdoors at midday for my particular pinhole, like this sun dial snapshot.

Teaching Tool

Why do this? Well, it's fun, and it's a completely unexpected way to use your digital camera.

In addition, your pinhole camera is a good prop to use for teaching kids about the basic physics of photography. Try making several foil body cap inserts with different-sized holes. You can demonstrate how the smaller the hole, the sharper the image--but also the darker the preview, and the longer the necessary exposure. An infinitely small hole would give you perfectly focused results, but the exposure time would be lengthy, since only one photon of light could get through to the sensor at a time.

Try It With a Point and Shoot

If you have a point-and-shoot camera with a removable lens cap, you can still try this experiment. The results won't be as authentic because you can't remove your lens, and the resulting photos will always be somewhat blurry. You'll need to drill the hole in a spare lens cap. When you take the pictures, set your lens to the longest telephoto setting available, then use your camera's manual focus mode to focus on infinity for the most authentic pinhole effect.


http://www.ecoustics.com/pcw/howto/132090

Frequently Asked Photo Questions for July

Getting colors into balance, finding an HDR app, taking concert photos, and more.

My parents live a few thousand miles from me, so I typically check in with them each week on the phone. Last week, my dad asked me a digital photo question, and I had to defer. "Send your question to question@davejoh.com," I told my father, "and if your question is selected, I'll answer it in the Digital Focus newsletter."

So here's the latest edition of reader mail--and sorry, Dad, it doesn't look like your question made it this time. If anyone else has a question, though, you can do what my dad does: Send me an e-mail.

Get published, get famous! Each week, we select our favorite reader-submitted photo based on creativity, originality, and technique. Every month, the best of the weekly winners gets a prize valued at between $15 and $50.

Here's how to enter: Send us your photograph in JPEG format, at a resolution no higher than 640 by 480 pixels. Entries at higher resolutions will be immediately disqualified. If necessary, use an image editing program to reduce the file size of your image before e-mailing it to us. Include the title of your photo along with a short description and how you photographed it. Don't forget to send your name, e-mail address, and postal address. Before entering, please read the full description of the contest rules and regulations.

Note: The Digital Focus photo contest is so popular, and we receive so many terrific photos, that we've decided to select a runner-up in addition to the weekly Hot Pic. Both Hot Pic of the Week and runner-up photos will be included in the Hot Pic of the Month poll--once we get it back up and running. Unfortunately, technical problems have prevented us from running the poll this month. Instead, I've selected the Hot Pic of the Month for June.

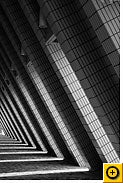
Click for full image.This Week's Hot Pic: "World of Triangles," by Vanessa Sam, Emeryville, California

Vanessa says: "I took this in Hong Kong. Because we were still jetlagged, we went out very early in the morning to walk around the city and chanced upon the beautiful morning sun shining through these slanted columns, creating an infinity of triangles."

Click for full image.Runner-up: "Come to Dinner," by Russ Fortson, Houston, Texas.

Russ writes: "I took this shot of four egrets outside my office; they were marching through the grass trying to scare up bugs for dinner. I took it with my Pentax K100D and Sigma 50-500 lens."

Click for full image.Hot Pic of the Month "Summer Anticipation," by Johanna Blakley, Farmington, Missouri. To see all the Hot Pic winners for June, view the slide show.

Congratulations to Johanna and to everyone else who won a Hot Pic of the Week last month. Keep those entries coming!

See all the Hot Pic of the Week photos online.

Too Yellow

I recently attended a wedding. The church was predominately yellow; there were yellowish brown pews with light yellow walls, there were stained glass windows, and both fluorescent and incandescent lighting, recessed in the ceiling. A lot of my pictures turned out very yellow! What can I do?

--Patty Hardy, Monterey, California

It sounds like setting the camera's white balance might have rescued some of your photos, Patty. When you're in a tricky lighting situation--such as when there's mixed florescent, incandescent, and natural lighting, for example, it's a good idea to set the white balance manually using a white or gray card. (Check your camera manual for instructions on how to do that.)

But even now, all is not lost. You can open your yellowish photos in a photo editing program like Paint Shop Pro or Adobe Photoshop Elements and use the white-balance adjustment to tweak the images until the color looks more natural. Another option: Try the automatic fix feature in your photo editor, like Photoshop Elements's Auto Adjust or Paint Shop Pro's One Step Photo Fix.

Where Can I Find HDR?

Dave, you really got my attention with the High Dynamic Range photography lesson in your recent newsletters. My favorite subjects are landscapes, and I'd like to try my hand at HDR photography too. I have been looking into upgrading to Paint Shop Pro 11, but it appears that the program doesn't include HDR. Is that true? I'd hate to have to learn a new program.

--John Klock, Charlotte, North Carolina

I'm afraid it is true, John. Corel Paint Shop Pro 11 doesn't include an HDR feature. There are a limited number of programs that have HDR capabilities. The ones I know about are Ulead PhotoImpact, Adobe Photoshop CS3, and HDRSoft Photomatix Pro, the program I used for my newsletters on the subject: "Stunning Photos With High Dynamic Range, Part 1" and "Stunning Photos With High Dynamic Range, Part 2."

Photographing a Photo

I am very new to photography and am trying to take a tricky photo without much luck. I have a photograph that was printed on glossy paper. I am trying to take a picture of this picture, using my digital camera. No matter what I do, I can't get a good picture. I get the glare from the flash. I have tried to change the lighting in the room, I have covered the flash part of my camera with a stocking diffuser, my finger, paper and other things yet I just can't get a good, clear picture. This picture is going to be used on the cover of a book. Any suggestions?

--Tiva Wallon, Boston

Sure, Tiva. To be honest, what you're trying to do is extremely difficult, and even if you do it well, the results will be only mediocre--certainly it'll never be of sufficient quality for publication on a book cover. It sounds like what you really want to do is scan the photo using a flatbed scanner. Even a $99 scanner would do a much better job than any camera. Worst case, you could simply take the photo to a copy shop and have it scanned there.

Concert Photos

Could you share some tips for taking pictures at an indoor concert? Mine typically come out too dark or too blurry.

--Bill Fournier, Cascade, Colorado

Indoor concerts are tricky, Bill, because there's so little light available. Your camera struggles to properly expose the photo, and ends up using a long shutter speed--which results in blur. If you tell the camera to use a faster shutter speed, the photos will probably come out too dark. The fix is to increase the camera's ISO, which is the setting that controls its sensitivity to light. Maximize the ISO at a concert and you'll get grainy, "noisy" photos, but they should be sharper and better exposed.

Check Your Monitor Resolution

I have been an amateur photographer for about 50 years. I retired my 35mm and have been shooting lots of digital photos recently. My problem surfaced when I moved from my old monitor to a new flat, wide-screen display. Both monitors run at 1024 by 768, but the people in the photos look fatter or stretched on the new monitor. I tried several different programs to view the pictures, but they all look the same. Any suggestions? I am thinking about hooking my old monitor just for viewing pictures.

--Tim Berbaum, Cananea Sonora, Mexico

Actually, Tim, the problem is the fact that you have the new wide-screen monitor configured to run at the same old resolution (1024 by 768) as the old monitor. That's roughly square (actually a 4:3 aspect ratio) but your new wide-screen monitor needs a resolution that matches its aspect ratio, which is 16:9. Check your monitor's manual; I think you'll find it should be running at a resolution closer to 1900 by 1200. After you fix that, everything will look much better on your new display.


http://www.ecoustics.com/pcw/howto/132762

Record Your Vacation From on High

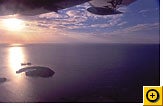
Click here to view full-size image.Take breathtaking photos from an aircraft window by minimizing camera shake, tweaking the focus and shutter speed, and more.

It seems that no matter where you go on vacation, there's some sort of airplane or helicopter tour available to let you get a better view. In fact, as you read these words, I plan to be on vacation, booking a sightseeing charter on a small plane somewhere. (I'll try to send you a postcard.)

Even on an ordinary airplane, there are some cool sights to be seen from that tiny little window. The next time you find yourself on a plane, snap a few shots.

If you're getting ready for your summer vacation, remember to pack your digital camera--and remember these tips for getting some great shots from the passenger window.

Get published, get famous! Each week, we select our favorite reader-submitted photo based on creativity, originality, and technique. Every month, the best of the weekly winners gets a prize valued at between $15 and $50.

Here's how to enter: Send us your photograph in JPEG format, at a resolution no higher than 640 by 480 pixels. Entries at higher resolutions will be immediately disqualified. If necessary, use an image editing program to reduce the file size of your image before e-mailing it to us. Include the title of your photo along with a short description and how you photographed it. Don't forget to send your name, e-mail address, and postal address. Before entering, please read the full description of the contest rules and regulations.

Click for full image.This week's Hot Pic: "Snake Bitten," by Justin Broniszewski, Oneida, New York

This photo doesn't seem very remarkable--after all, it's just a picture of a car--until you learn that this is a die-cast model just a few inches long. The realism of the photo blows you away.

About this photo, Justin wrote: "I used my Kodak P850. In addition to photography, my hobbies include die cast collecting. The cars and trucks that I collect are 1:18 scale and are around 9 or 10 inches long. Since buying my first digital camera, I have been trying to photograph my die casts in a way that is realistic. The P850 allows me to get shots like this one. The model is a 2003 Dodge Viper SRT-10, made by a company called AUTOart, and I took it near an old feed mill. The key to making these miniature cars look real is to get a wide depth of field. I always use the F8 setting for the aperture, with no flash."

Click for full image.This week's runner-up: "Rusted," by Jennean Wright, Provo, Utah

Jennean writes, "I took this picture in my backyard, on a piece of wood that surrounds my garden. I used a Kodak Easyshare C875, set on close-up mode."

See all the Hot Pic of the Week photos online.Plan Ahead If you're headed off for a sightseeing trip, let the flight crew know you have a camera and would like a seat that is close to one of the large windows. That's not always possible--in a helicopter, for example, they arrange passengers by weight--but it doesn't hurt to ask.

In addition, if you're on a sightseeing flight, ask the pilot before you take off if you can open any of the windows. Regulations sometimes prohibit open windows, but getting glass out of the way can dramatically improve your shots. And at the risk of being really annoying, if you're stuck shooting through glass, ask if you can clean the windows beforehand. I once was positioned next to a horribly dirty window, but I asked if it could be cleaned--and the ground crew wiped it down for me before we took off. I got some nice photos as a result.

Watch Out for Vibrations

So, there you are: 10,000 feet in the air and circling the Grand Canyon, Hoover Dam, a Hawaiian waterfall, or the Statue of Liberty.

It might seem like a good idea to steady the camera by leaning it against the aircraft itself or the window. However, the vibration from the engine will ruin your photos. Suspend the camera in front of you, and be careful to keep from transmitting vibrations from the wall and window to your camera.

Shoot Fast

Likewise, shoot at the highest shutter speed possible to counteract the natural motion of the aircraft. If your camera has a shutter priority or action photography mode, you can use that.

The more you zoom, the higher your shutter speed should be. For example, if you're taking a wide-angle, panoramic-style shot of the earth below you, a leisurely 1/30 or 1/60 second might be enough. But if you take advantage of your camera's 10X optical zoom to pick a squirrel out of a tree from a helicopter that's 5,000 feet in the air, you should be shooting at the fastest speed your camera can muster. To help your camera find a faster speed, try increasing the ISO a little.

Don't Focus

At the distances you'll be shooting, there's no need to focus your camera; everything will be at "infinity." If your camera has a manual focus mode, use that mode and then set the focus on infinity.

The advantages? You don't have to wait while the camera fruitlessly searches for the right focus, and you don't risk the camera accidentally focusing on dirt on the aircraft window and ruining your shot.

If your camera doesn't have a manual focus control, then it almost certainly has a Landscape exposure mode (often one of the scene settings). One of the things that Landscape does is set your camera to focus at infinity, so that's a good substitute.

And by the way, before you head off on vacation, take a look at some of my other vacation photo tips from the past: "Take Better Travel Photos" and "More Travel Photo Tips."


http://www.ecoustics.com/pcw/howto/133648


Digital Camera FAQs

What is the difference between optical and digital zoom?

Optical zoom on a digital camera works the same way a regular 35mm camera's zoom works, the lens physically moves in and out using the optics (lens) to bring the subject closer without sacrificing quality. These moving lenses allows a range in optical magnification that runs anywhere from 2.0x to 10.0x. The higher the optical zoom on a camera, the farther away you can be to take a photograph and still get a clear, close image.

Digital zoom is a software simulation of optical zoom using no moving parts. Simply put, the camera crops the picture and enlarges it, filling in the extra pixels by guessing what the picture may look like in a process called interpolation. This results in a loss of quality, and is no different than cropping and enlarging an image with editing software. Instead of using the digital zoom on your digital camera you can use editing software on your computer and have more control over cropping and enlarging the picture.

Many new models of digital cameras are advertising having both optical and digital zoom capabilities. Most of these cameras have a feature that automatically uses digital zoom when you have exceeded the optical zoom limitations. You may choose to disable or shut this feature off so that you know exactly what kind of quality picture you are taking.

How much zoom does your digital camera need?

Optical zoom ranges between 2x and 10x but most average users find 3x to 6x optical zoom about what they need. Most experts will tell you to buy as much optical zoom as you can afford being careful not to overlook the other features.

What is megapixel?

Ok, first let's define pixel. Digital images like our computer screens and digital camera pictures are both made up of grids of dots. The word "pixel" is actually short for "picture element", which is computer geek talk for one of those millions of dots on your computer screen or digital image. Now, every one of those pixels holds one color and combined with the other millions of single colored dots, forms the picture. Megapixel means a million pixels, so a 3 megapixel digital camera has 3 million pixels. To get the total pixel count, you multiply the horizontal pixels by the vertical pixels. For example, 2590 x 1920 = 5 Megapixels. The more mega pixels your digital camera has, the more information and detail you capture on each picture. Say for example, you a take a picture, once with a 2 megapixel digital camera and once again with a 4 megapixel digital camera. The 2 megapixel digital camera will give you 2 million pieces of information (pixels) and the 4 megapixel digital camera gives you 4 million pieces of information (pixels). If you print both the pictures 4x6, you probably would not be able to tell the difference between the two. Now say you were to crop the pictures or enlarge those pictures to 8x10, you would see a big difference in the two photos. The picture taken by the 4 megapixel digital camera would be a clearer, truer image replication because the picture contains more information than the 2 megapixel digital camera.

How many megapixels does my digital camera need?-It mostly depends on what you plan on doing with the pictures and images. If you do not often crop your photos and only print 4x6/5x7 size photos, a 2-3 megapixel digital camera will do the trick. If you ever plan to make 8x10 or larger prints at least 4 megapixels would be suggested. Of course most would tell you to buy the highest megapixel digital camera you could afford, but the smart ones would also remind you there are a lot of other of other features besides megapixel you want to look at when making your digital camera purchase.

What is the difference between a Nickel-Metal Hydride battery and a nickel-cadmium battery?

A Nickel-Metal Hydride battery (or NiMH) is a rechargeable battery similar in design with a Nickel-Cadmium battery (or Ni-Cd) but instead of using cadmium, which is an environmental hazard, it uses a hydrogen absorbing alloy for anode. A Nickel-Metal Hydride battery can have 2 to 3 times the capacity of an equivalent size NiCd , the memory effect is not as significant and it is less detrimental to the environment compared to a Nickel-Cadmium battery.

Find more helpful digital camera articles written by this author at Digital Camera Help, including memory cards, WiFi digital cameras, digital camera batteries, lenes, and photo editing software.


http://www.slrtoday.com/articles/59/1/Digital-Camera-FAQs/Page1.html

Camera flashes reveal scenes in 3D

Digital cameras and camera-phones could capture 3D information using just an in-built flash and some clever software, say Japanese researchers.

Kazunori Umeda and Naoya Ogawa from Chuo University in Tokyo, Japan, were inspired by a prototype device made by electronics manufacturer Toshiba in 1999, called the Motion Processor.

It resembles a webcam surrounded by several infrared LEDs. It captures 3D information by recording the pattern and intensity of infrared light reflected by a scene. Since this depends to an extent on the distance and orientation of an object, it is possible to calculate simple things like roughly how far away it is and how it is positioned.

This made it possible for the Motion Processor to detect a user's hand gestures to control software. "Toshiba proposed the infrared system as an interface device for a PC – a kind of 3D mouse," explains Umeda. "Our aim is to add range measurement function to a standard digital camera."

To do this, Umeda's team used a consumer digital camera. They took pictures of simple objects with and without a flash activated. By mathematically subtracting the first image from the second it was possible to examine just the light reflected from the flash.
Image subtraction

Comparing the pattern and strength of this reflected light allowed them to estimate the distances to, and the relative angles of, different surfaces in a scene. The researchers tested the method using angled pieces of card (see image), and more complex scenes such as a whole room.

Their results show that a rough 3D model can reconstructed using the technique, although identifying some surfaces can be a problem. "A diffuse, white surface is easiest," Umeda told New Scientist, "and [reflective] surfaces are hardest - the worst is a mirror."

Umeda has not devoted much thought to potential applications, but says the system could perhaps be used to automatically pick out people in an image, by distinguishing them from the background.

The device currently estimates distances with an accuracy of around 6%. But the researchers say they can improve this by taking into account the way different parts of a scene are illuminated by a flash. For example, objects around the edge of a scene are not illuminated as well as those at the centre. Future research will also test whether they can create 3D images of more irregularly shaped objects.


http://www.newscientisttech.com/article/dn11776-camera-flashes-reveal-scenes-in-3d.html

Creating One of the World’s Highest-Resolution Digital Cameras

Phase One combined the low power consumption of the CoolRunner-II CPLD with the functional capabilities of the Virtex-II family.

From casual consumers to experienced professionals, digital photography has changed the way we all think about taking pictures. Indeed, digital cameras are replacing traditional film cameras at a faster rate than ever.

At the same time, digital image quality is improving quickly. Whereas consumer digital cameras typically have around 3 million pixels for an image, professional digital cameras have from 6 million to 22 million pixels.

As such, they present a far greater engineering challenge. Their large image file sizes must be moved quickly to achieve the high frame rates that professionals (such as fashion photographers) require. These cameras must also have advanced image processing capabilities and precise power management to extend battery life and reduce image distortion, which can be caused by thermal noise from high power dissipation of the built-in electronics.

At Phase One, we found a solution to these engineering challenges by incorporating the Xilinx CoolRunner-II™ CPLD and the Virtex™-II FPGA into the design of our digital camera back, the H25.

Modular Camera Design
Figure 1 shows the modular structure of a generic professional-quality, medium-format camera. This modularity allows photographers to not only swap lenses, but to use a different viewfinder or an alternative camera back.

A conventional camera back contains the type of film being used, but Phase One now produces a range of digital camera backs compatible with medium-format camera systems, enabling improved workflow and new creative opportunities. Compared to film, these camera backs also improve image quality and color reproduction.

Technical Requirements
At Phase One, we have created digital imaging solutions for professional photographers since 1993, supplying cameras for medical diagnostics and aerial photography as well as studio and fashion photography. Through the years we have also supplied numerous OEM solutions for technically demanding applications. Our customers demand very high resolution, high sensitivity, ruggedness, reliability, a high continuous capture rate, and perfect color reproduction.

High-end professional film formats are larger than the 35-mm standard. For example, the classic 6 cm x 6 cm Hasselblad™ medium format is a favorite among professional photographers. Newer autofocus cameras from Hasselblad, Contax™, Mamiya™, and Fuji™ use a 6 cm x 4.5 cm format, which has also become popular. These larger film formats enable higherresolution digital camera solutions without compromising image quality, which is highly dependent on pixel size. Larger pixels typically yield higher sensitivity and less noise.

Phase One digital camera backs are now available with image sensors ranging from 6 to 22 megapixels. This enables an active imaging area as large as 48 mm x 36 mm in our flagship H25 digital camera back.

The H25 image sensor is a huge piece of silicon that dwarfs even a large FPGA die. In fact, it is currently one of the world’s largest commercially available imaging sensors, and helps the H25 push digital photography beyond the image quality of traditional film.

The specification for the H25 camera platform included the following key points:

* Huge image file sizes: 128 MB/image allows for 16 bits per color, for a total of 48 bits of red/green/blue (RGB) color depth
* Data moving capability as fast as 7 Gbps
* Big image buffer for long burst sequences
* Storage of uncompressed or losslessly compressed images in the RAW image format to keep the highest possible image quality
* High sustained frame rates with more than 30 frames/minute (faster frame rates are possible when images are captured in a burst)
* High processing power to enable severe image processing and compression
* 400 Mb IEEE1394 connection with proprietary high-speed image data streaming
* Advanced power management to reduce thermal dissipation as well as prolong battery life
* Small physical size.

Hardware Selection
When designing the H25, we used the CoolRunner-II CPLD to implement serial controllers, interrupt controller, and power management functions. We also used the plentiful on-chip resources of the CoolRunner-II device to implement the user interface controller, camera body interface, and glue logic.

The low current draw of the CoolRunner-II CPLD allowed us to minimize power dissipation, extending battery life and reducing the effects of thermal noise on image quality.

The powerful features embedded in the Virtex-II architecture provided even greater opportunities to maximize the performance of the H25, while also meeting important marketing targets.

Apart from restrictions on size, weight, and power, cost is always a concern. Time to market is paramount – the majority of our income from a new camera comes within the first year of its lifetime.

We considered alternatives, including ASIC and other “hard-coded” FPGA technologies. Although these were technically feasible, it was far more cost-effective, easier, and faster to complete the design using Virtex-II FPGAs.

Figure 2 outlines the functional blocks of the Phase One H25 digital camera platform.

Implementing the H25 Camera Platform
We combined the high parallel image processing capability of the Virtex-II on-chip multipliers with the advanced digital clock managers (DCMs) and block RAMs to configure the Virtex-II FPGA as a powerful co-processsor chip. The Virtex-II device had ample capacity to offload most of the high data-rate tasks and image processing.

At the same time, we were able to implement large numbers of customized controllers within the device, thereby reducing the physical size. This also made it extremely easy to interface the central processor to various hardware blocks.

The DCMs are a huge benefit in systems where off-chip and on-chip frequencies are high. They enable easy and flexible de-skewing of board clocks and are very useful, for instance, in high-speed SDRAM controllers. No other FPGA vendor provides such an abundance of DCMs.

This is especially valuable in our application, because we use many different highspeed clocks when interfacing to different sections of the board. It also allowed us to apply a very fine-grained power management structure where various sections can be powered down or slowed to reduce the total power consumption. The H25 continuously adjusts frequencies on-the-fly to fulfill user demands at the lowest power consumption.

Virtex-II’s SelectIO™+ technology supports high-speed signaling standards. We used these to move data onto and off the chip at 7 Gbps.

However, internal bandwidth is much higher if you consider all parallel processes that use local storage. We therefore used the Virtex-II block RAMs to implement various first in first outs (FIFOs), to handle data movement across different clock domains and on-chip local data caches. On-chip caches are absolutely essential for implementing high-speed image processing algorithms as well as advanced image compression.

By moving these functions into the Virtex-II FPGA, we also freed the main processor to execute real-time operating system (RTOS)-based system controller functions. This created a system performance overhead that can support additional functionality as market requirements increase. We can also upgrade products already in the field, adding new functions as we develop them.

Virtex-II’s in-field reprogramming is crucial to this capability because it implements so much of the camera’s functionality. This easy upgrade path also helps win loyalty from photographers, who see value in receiving ongoing improvements. We can keep ahead of our competition without having to release a totally new product every month. And we can assure our customers that they will always have a superior camera.

Conclusion
At Phase One we are committed to staying ahead of the competition, with excellent image fidelity in the field of digital highend imaging. We hope to continue to push digital imaging beyond current technical boundaries.

The current trend towards breaking down the barriers between embedded software and hardware will help us to continuously exploit the technical capabilities of Xilinx FPGAs and CPLDs to achieve this ambitious goal.


http://www.xilinx.com/publications/xcellonline/xcell_48/xc_phaseone48.htm

5 Steps To Being More Photogenic

5 Steps To Being More PhotogenicNot everyone feels comfortable having their picture taken. Unless you attended modeling school or took a ‘how to be more photogenic‘ class in junior high, high school, or college chances are when find yourself in front of a camera you end up, ‘winging it,’ which doesn’t always work out in your favor.

So the question is, why do some people always seem to look good in pictures?

Truth is, some people have a triggered response when they are in front of a camera. They do certain things that make them look better. You can also develop a triggered response that makes YOU look better.

These photogenic steps are based on over 10 years of professional photography and came into being primarily out of financial inspiration.

Put more bluntly, when you photograph people for a living…

* If they don’t like how they look in the pictures
* They do not buy any pictures
* You do not make any money!

So… you learn how to coach people into doing things that make them look good.

Use these 5 steps and you too will develop a triggered response that will insure you look your best.

Step 1

If you observe men and women standing naturally without ANY coaching, you’ll notice there is a BIG difference between how they stand. Women naturally shift weight to one foot. Doing so angles the body slightly, tips the shoulders a little, and angles the head just a bit. This stance immediately adds dimension to any photo, it looks more interesting and natural.

Men on the other hand, we tend to face squarely into the camera with weight evenly distributed on both feet. We have all seen the results, pictures that look stiff, unnatural, and very plain looking.

Here’s the solution.

If you are standing - turn slightly and rest your weight on one foot. It may FEEL goofy, but you WILL look better.

If you are sitting – angle to one side or the other.

Step 2

Lean slightly toward the camera – Leaning slightly toward the camera adds interest, dimension, and a natural look to a photo. Think of having a long neck like a gazelle, and tilt your chin down just a bit to avoid the appearance of a double chin and also to prevent the camera from getting a view right up your nostrils.

Step 3

Learn how to change your state – No, I don’t mean if you live in Idaho you need to move to Oregon. Changing state means going from level 1 to level 5, or in other words, instead of looking like you were caught off guard, you look natural and like you are enjoying yourself.

Models are taught to change state by developing a ‘trigger.’ So when they are about to have their picture taken, even if they are in a crummy mood, they can go from level 1 to level 5 in a heart beat. Firing a trigger is a reminder to do the things that make you look good. Believe it or not, THE most successful trigger we found over the years was called the ‘rear cheek squeeze.’ It’s really cool because it’s inconspicuous. Yes, it’s exactly what it sounds like; you squeeze the cheeks of your rear end together. Don’t make fun of it until you try it. To see it’s effectiveness try this experiment. Ask someone to sit on a chair and then ask them to squeeze their cheeks together. I have not met ONE person who doesn’t immediately smile and say something like, okay, now what?

Step 4

Learn to ¾ smile – People just don’t like pictures of themselves with huge smiles. Smiling too big exposes gums and causes your eyes to turn into slits.

Step 5

Never look directly at the lens – ALWAYS, look slightly ABOVE the lens.

Here are some additional tips if you know you are going to have your photo taken and you have a little time to prepare.

1. If needed, use ‘teeth whitener’ to have pearly white teeth - it does make a difference. Plan ahead and give yourself enough time to brighten your smile. Get a teeth whitening kits at your local pharmacy.
2. Dress for timelessness - Stay away from patterns, go more for solids. Example: horizontal stripes will make you look heavy. Don’t wear red, black or white. Digital cameras sometimes have problems with red. Black and white offer too much contrast.


http://www.digitalcameratracker.com/5-steps-to-being-more-photogenic/

The Seitz 160-Megapixel D3 Digital Camera

Although Photokina is long over, at least for another two years, we had to mention just one more camera that caught everyone's eye: the Seitz D3 6x17 160-megapixel digital camera. This camera easily has the highest resolution capability of any device we have seen. In RAW mode, each 160-megapixel image takes up about 307 MB of storage space. Despite the camera's power, it is also surprisingly fast, capable of taking those 160-megapixel photos in just one second, and a maximum exposure speed of 1/20,000 second. Another very impressive feature is the camera's ISO range, which is an unheard of 500 to 10,000. No wonder the camera is said to work in almost any light condition. The Seitz D3 should be available in January 2006 for 28,900 Euros, or about $36,500.


Seitz 6x17 Digital – 160 Million Pixels In One Second – The Digital Revolution in 6x17 Panoramic Photography

Lustdorf / Switzerland – 18 September 2006. Swiss company Seitz Phototechnik AG expands the current boundaries in digital photography. With the new Seitz D3 scan technology it is possible to create a digital 6x17 image with impressive resolution (160 million pixels) in one second. The new Seitz 6x17 digital camera with its D3 digital back is equipped with the first high-speed scanning sensor developed specifically for photography. Over the last years Seitz has worked closely with specialists of DALSA Corporation from sensor design to prototyping and production. In this way, it has been possible to tailor the capabilities of the new sensor to the exact needs of the photographer: very high speed, increased sensitivity and very high image quality as required for photography applications. The new camera system is fully mobile and easy to operate thanks to a handheld device with a graphical touch-screen. For data transfer and communication the latest computer technologies are used. World-class lenses by Schneider, Rodenstock or other large-format brands can be used with the new camera and can be used interchangeably with the new camera. The Seitz D3 sensor cassette can also be fitted to other cameras, such as our new Roundshot D3 360° Panorama camera, which makes the investment in the Seitz D3 technology truly rewarding.

High Speed & Sensitivity

This scan back 6x17 camera is extremely fast. The image results are comparable to a one-shot digital or film back. This is possible thanks to a very high read-out speed of 300 MB per second - 100x faster than for any existing scan back. The fastest exposure speed is 1/20’000 sec. - or just one second for the entire 6x17 scan at full resolution! Compared to previous surface sensors, the sensitivity of the Seitz D3 sensor is significantly higher. Comparing it with conventional scanning cameras, the sensitivity is increased by factor 100. This results in a very broad ISO/ASA range (equivalent) of 500 to 10,000, which makes this camera the perfect instrument for virtually all light situations. Our new stage selection technology allows to control sensitivity by selecting smaller or larger areas of the sensor. This means: additional sensitivity without any additional noise!

Substantial Resolution

What few thought possible has now come true: wide-format digital photography. With a resolution of 7,500 pixels vertically and 21,250 pixels horizontally the new Seitz camera creates a 160 million pixel image. This substantial resolution makes it possible to create high quality reproductions. A variety of different formats is possible: 6x6, 6x9, 6x15 or a full 6x17 panorama. No limits for high definition photography!

Very High Image Quality

The new Seitz D3 sensor technology is a true technological breakthrough not only in speed and resolution but also in its impressive image quality. The new Seitz 6x17 digital camera corrects natural brightness decrease towards the edge without the use of a centre filter. The image has a 48-bit colour depth and a high dynamic range. When shooting directly into the sun, the sensor’s anti-blooming feature reduces glare and allows a clean passage between highlights and lowlights. The image is further enhanced by advanced optimisation algorithms developed by Seitz for ultimate image quality. Of course the photographer can also work directly on the raw image and apply personalised raw conversion settings.

Leading Edge Digital Technology

The Digital 3 scan back sensor has been designed and developed exclusively for Seitz by DALSA Corporation. In this multi-year project specialists around the world have brought together the best capabilities in digital technology, computer science, image optimisation and knowledge of photography applications to build a camera system that goes beyond the imaginable.

Handheld and simple to work with

The Seitz 6x17 Digital is a pleasure to work with. Thanks to ergonomical hand grips the camera is perfectly stable for handheld images. Operating the camera is easy: a touch screen can be attached to the camera body or removed for wireless control with all camera functions displayed via simple graphical icons. The 640x480 pixel colour screen is the biggest camera screen today and allows perfect preview, editing, zooming and image control.

Latest Computer Technology

A 6x17 digital panorama (uncompressed) represents about 950 MB. To process and store such large amounts of data Seitz created a state-of-the-art computer system. Data is transferred by gigabit ethernet from the sensor to the storage device. The portable storage device is itself a computer with most advanced characteristics in processing, disk space and memory features. Additionally, the camera and handheld control unit take advantage of the latest IP network technology, making it possible to connect the camera to a network and control it remotely.

Fully Mobile and Open System

Seitz designed this camera to meet the expectations of those photographers who like to take their equipment on exploratory adventures. All components are fully modular - the portable storage device and the handheld device can be adapted to specific needs of the photographer. The camera can also be used in the studio, running the software from a computer (Mac, PC, Linux) via ethernet connection.

Equipped With World-Class Lenses

For best image results Seitz recommends using the advanced Schneider or Rodenstock lenses on a Seitz lens board, though large-format lenses of existing 6x17 panoramic cameras such as Linhof Technorama, Fuji and others can also be used. These lenses are connected to the Seitz camera on an optional adaptor plate. All lens types and brands can be interchanged without any restrictions.

A Rewarding Investment

Just like a traditional digital back the Seitz D3 scan back cassette can be removed from the 6x17 camera body and fitted to other cameras, e.g. the new Roundshot D3 360° panorama camera and, in the future, to other large or medium format cameras. The possibility of using the scan back in a variety of different cameras makes the system truly versatile - to the benefit of the photographer.

The Rolex Of Cameras

With increasing image resolution the engineering precision of the camera hardware becomes very important. All Seitz cameras are made from solid blocks of aluminium as used in space technology and produced with state-of-the-art CNC machinery. Machining tolerances are at the decisive 1/100 mm. Uncompromising precision and perfectly adjusted lenses are our guarantee for excellent results. Every Seitz 6x17 camera is hand-made in Switzerland and is unique.

Introduction In January 2007

Presented at photokina 2006 for the first time, the new camera system will be available as of January 2007. The price for the Seitz 6x17 Digital panorama camera with its Seitz D3 scan back (mobile version) is 45’500 Swiss Francs (28’900 Euro) and for the studio version 42’300 Swiss Francs (26’900 Euro). The Seitz D3 scan back can also be bought separately and costs 36’000 Swiss Francs (22’900 Euro).


http://www.slrtoday.com/articles/64/1/The-Seitz-160-Megapixel-D3-Digital-Camera/Page1.html